In this article: we’ll show you how to manage the Email Forms feature within the Go Church App builder.
The Email Forms feature allows you to easily collect information from your users that can be sent to any email address. Within this feature you can:
- Add multiple forms to one tab
- Create a new form for a registration for an event, a message form to a specific staff member, a general form, and more
- Customize the design (colors, fonts, header image)
- Add in a variety of different fields like checkboxes, multiple choice, etc
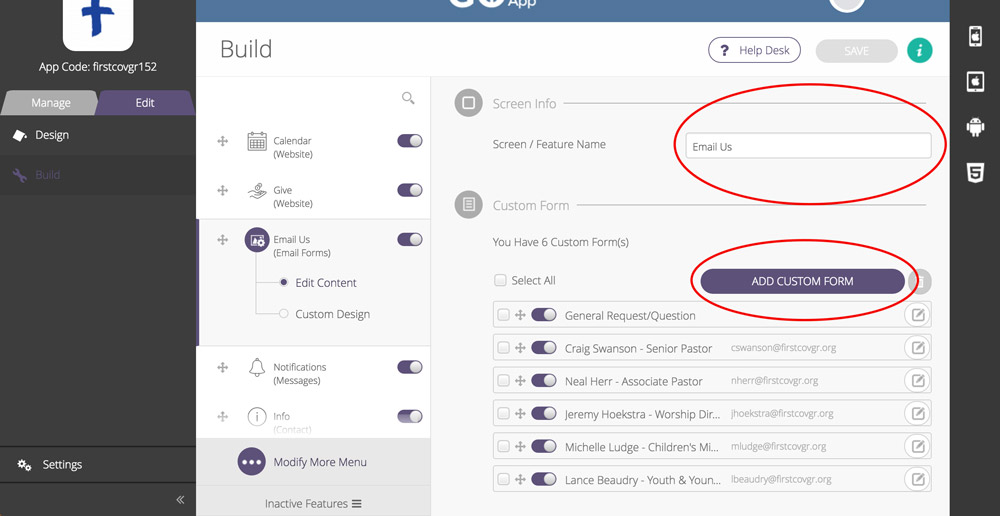
- In your admin panel / CMS navigate to Edit > Build > and select an Email Forms feature.
- Rename the tab to describe the form’s function. Select ADD CUSTOM FORM to create a new form.
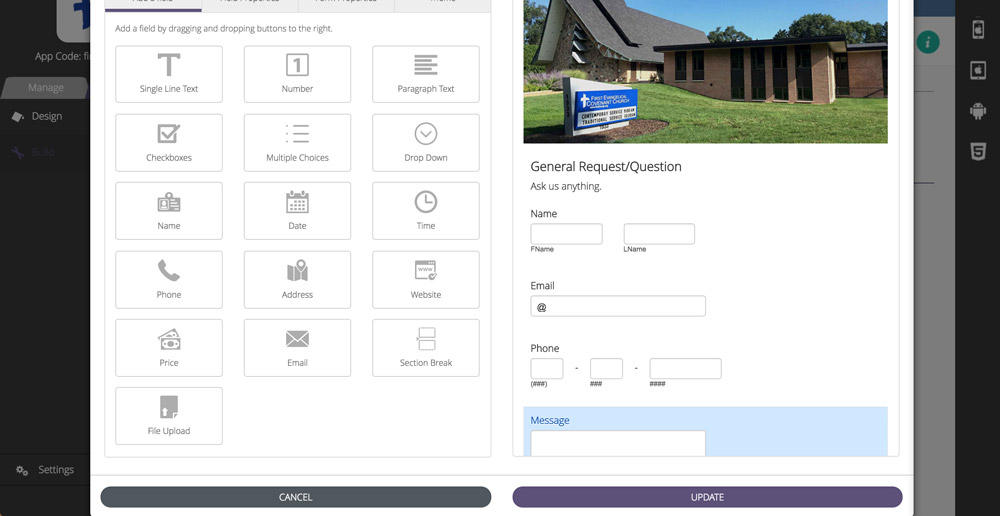
- A modal window will appear. The tab Add a field at the top left will be underlined. Here, you can drag and drop to the right all of the form fields that you would like in your form. Make sure you drag the fields above the Submit button for them to stay in place and a gray box will appear when you can drop.
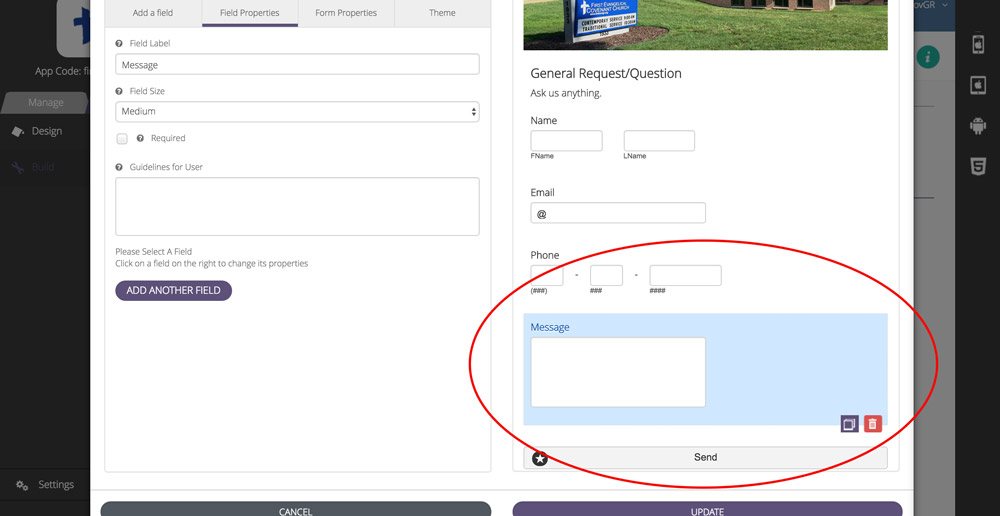
- To edit each field’s properties (the field label, size, whether or not it is required, and guidelines for using) select each individual field one at a time.
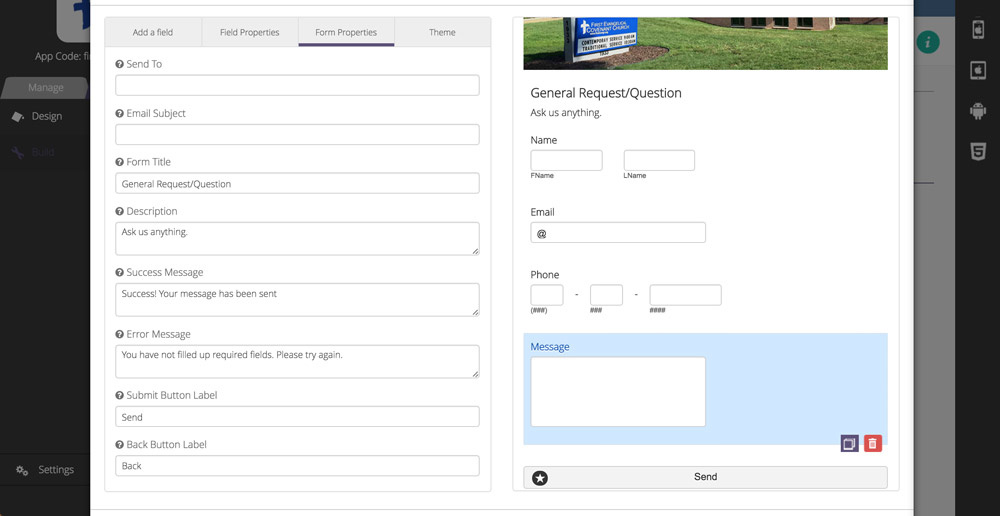
- Next, navigate to Form Properties at the top left. Here you can manage what email(s) the form data is sent to (separate multiple emails with a comma), the subject of the email for your reference, the title and description of the form as it appears within the app, error and success messages, and the submit button label.
- Finally, you can customize the design of your form to match that of the rest of your app. Select Theme in the upper left of the window. You can add a custom header image and change all the colors and fonts of each element within the form.
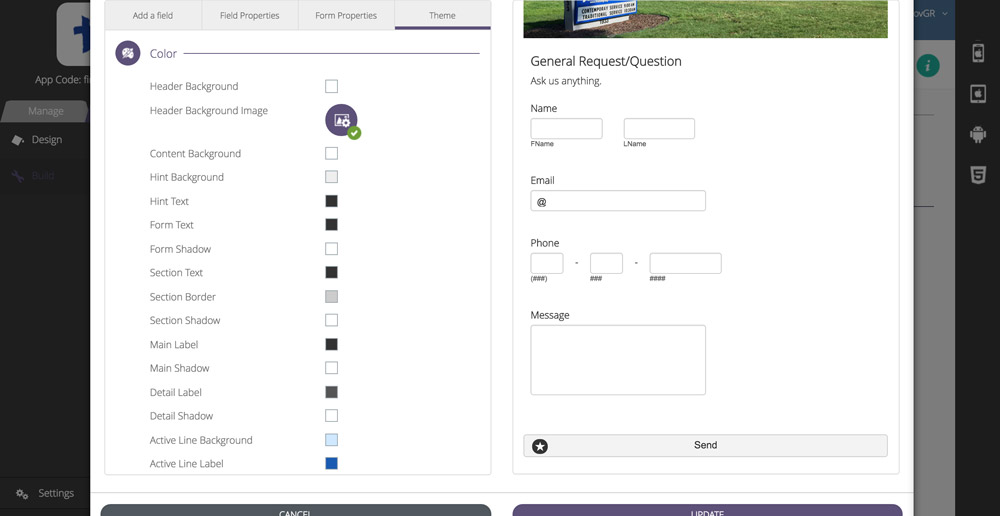
- Once you are finished editing your form, select Update and then Save.
Tips & Tricks:
- Keep the number of fields to a minimum for best user experience.

