In this article: we’ll show you how to send and schedule push notifications from you admin panel / CMS.
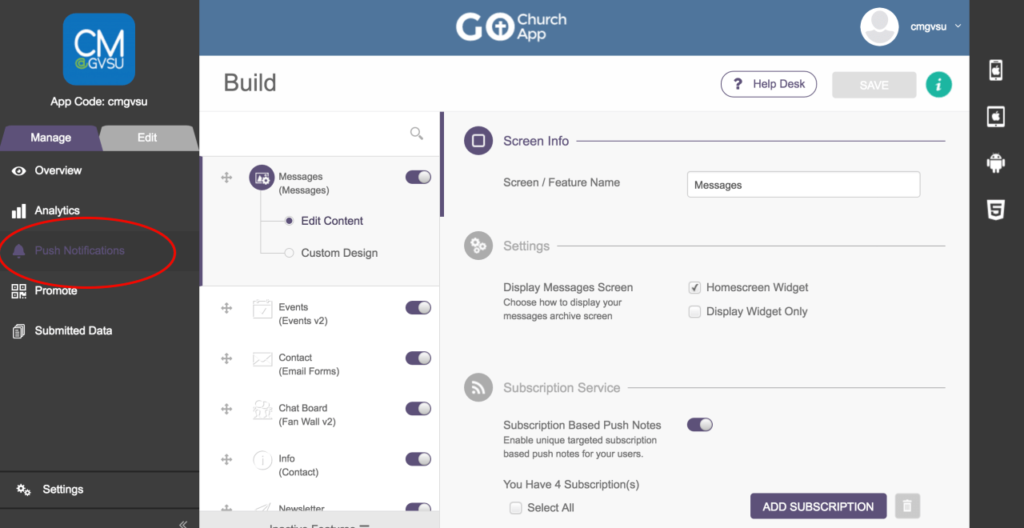
- In your admin panel / CMS navigate to Manage > Push Notifications
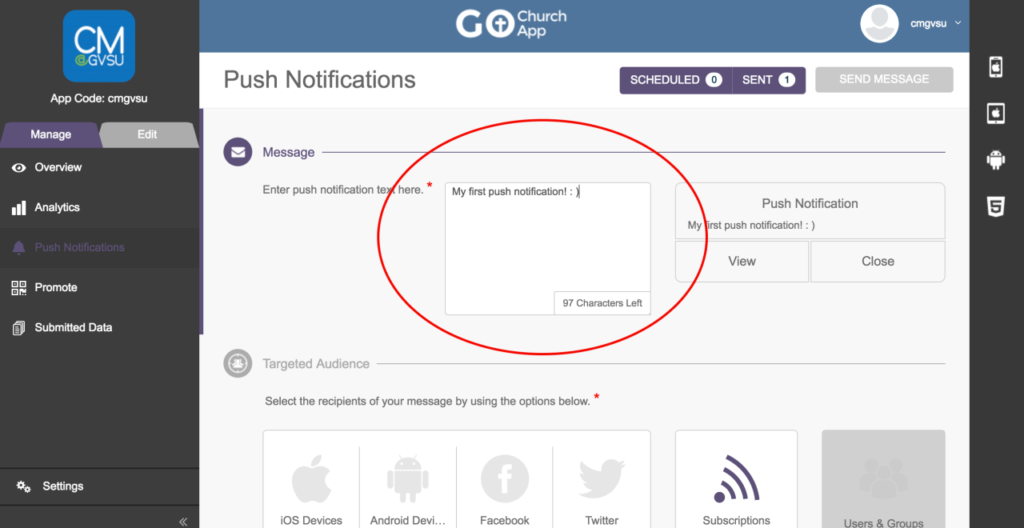
- Enter your notification message.
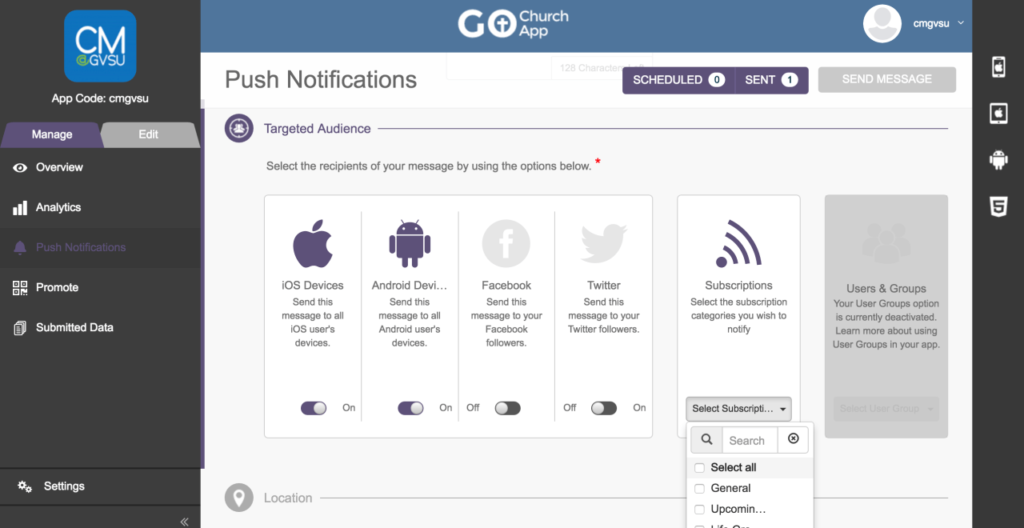
- Scroll down to the Targeted Audience section and select where your push notification message will go. We recommend always selecting iOS and Android devices. Optionally you can connect to a Facebook Page and Twitter Account. Under Subscriptions choose the groups/categories the message is for (subscriptions can be managed under Edit > Build > Messages).
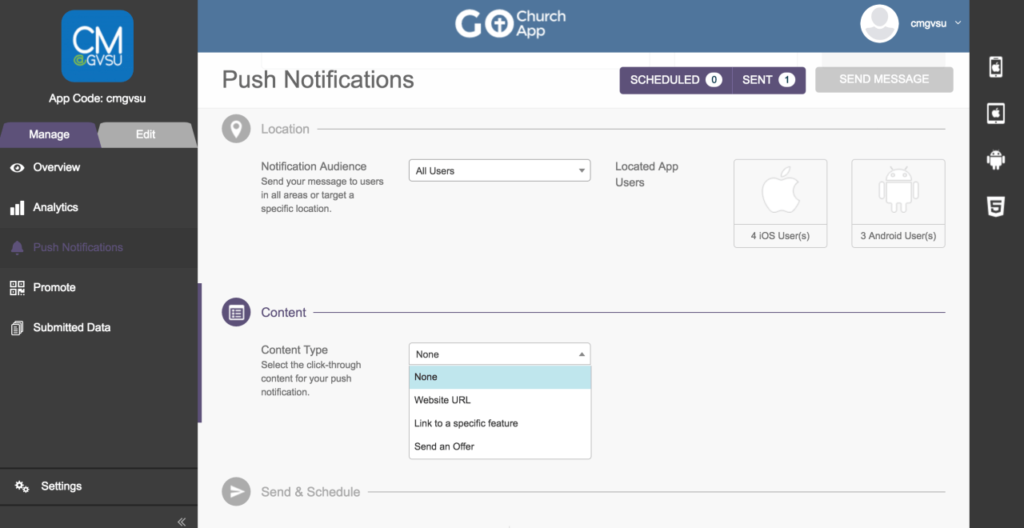
- Next you’ll scroll down to the Content section. This is where the notification will take your user. You can choose 4 different options. None will just be sent as a standalone message that won’t bring the user somewhere.
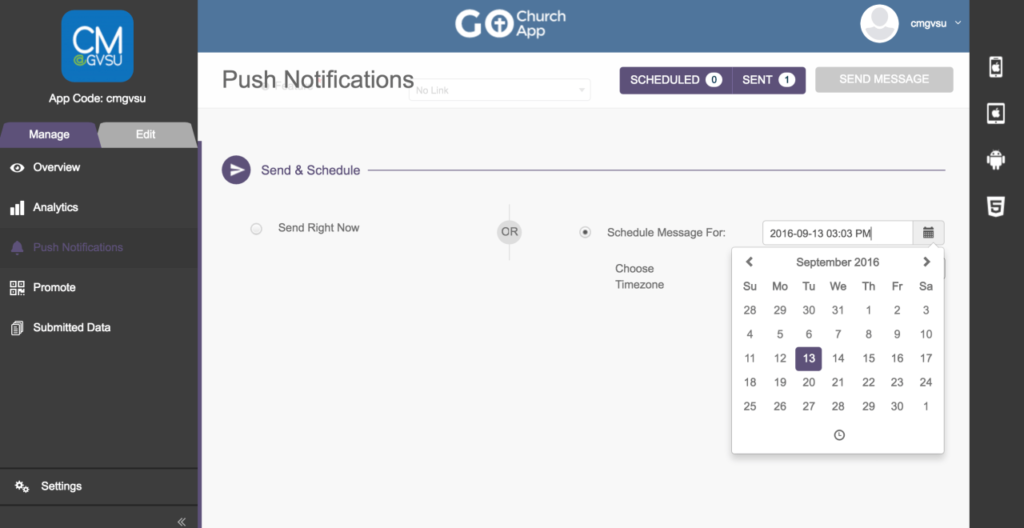
- In the last section, you will be able to select whether to send the push notification now or schedule for a later time (make sure your time zone is correctly set).
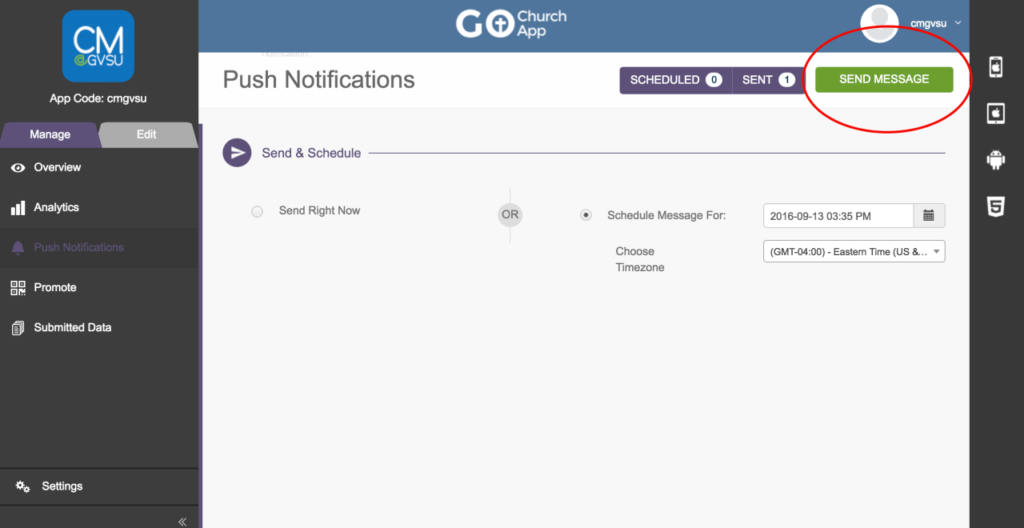
- Lastly, whether you are scheduling or sending right away, select Send Message at the top right.
Tips & Tricks:
- Make sure your push notification content is relevant to the subscription/group(s) you are sending it to.
- Don’t send too many push notifications. Users can get annoyed getting a push notification from the same app every single day.
- Schedule all of your push notifications once a month. To delete scheduled push notifications, select Scheduled at the top and select the delete button next to the notification you’d like to delete.

